
Hardwood floors, fine furniture, cabinets, and doors; wood is popularly used to create a warm and authentic atmosphere.
However, because wood is a living material, the ravages of time can leave great wood looking old and neglected.
Varnish is often used to preserve the inherent beauty and elegant look of wood furniture and fixtures.
A coat of varnish can mean the difference between a long, lustrous lifespan and a lifespan cut short by exposure to the elements.
But, Is It Safe To Use Varnish Indoors?
Well, while the resins and solvents used in varnish are toxic if ingested, you can safely use varnish indoors. This is especially true considering that varnish, like other volatile organic compounds (VOCs), is only toxic in liquid form and becomes non-toxic after curing. When it comes to using varnish indoors, all you need is to ensure the rooms you’re varnishing remain well-ventilated during application and throughout the drying time.
Notably, the solvents in varnish are extremely pungent, and the fumes can cause drowsiness, headaches, vomiting, or irritate the skin.
For this reason, if you are planning to have your wooden floors and other fixtures varnished, it is a good idea to make arrangements to stay somewhere else until the nauseating smell is gone. Typically, the varnish smell lasts 5-7 days, but exactly how long depends on several factors. Read on to learn more about varnishing indoors.
What is Varnish?
If you appreciate the immanent beauty of wood, a coat of wood varnish can help you preserve that great look of your wooden floor, furniture, and fixtures.
This is because, when applied properly, varnish cures to form a durable and flexible protective coat.
Before getting further, varnish should not be confused with polyurethane — a plastic-like sealant or finish product that looks like varnish when applied.
When it comes to indoor varnishing, what you need to know is that varnish is made of resins and solvents. These ingredients are classified as VOCs.
As the varnish dries, the VOCs emit toxic fumes that pose risks to human health, particularly when inhaled. Varnish can also be harmful when ingested.
Even so, this doesn’t mean you can’t use varnish indoors.
For homeowners looking to preserve the valuable wooden features in their homes, the good news is you can safely use varnish indoors.
Varnish is usually harmful in liquid form, so all you need is to avoid inhaling the fumes throughout application and curing. If you are a savvy DIYer and elect to apply varnish by yourself, make sure to wear a mask when applying.
The varnish will dry, and with proper ventilation, the pungent smell will be gone in about a week.
Notably, varnish should be applied in several layers for optimal results.
Otherwise, it can peel, crack, or form bubbles that make your wooden floors, furniture, and other features more susceptible to damage by the elements.
With proper applications and under the right conditions, varnish dries, giving wood surfaces a photo finish.
The protective film formed by fully cured varnish protects wood from damage by weather elements, including water.
From an aesthetic stance, varnish protects the natural look of wood.
How To Varnish Properly In Four Steps
Varnish enhances the elegant look of wood while delivering a lovely rich sheen. If you are a DIYer planning to varnish your wooden features, here are steps and tips for completing the project.
1. Prepare The Surface You Want To Varnish
When it comes to preparing, the idea is to make the surface dust and dirt free.
An easy way to get rid of dust and dirt is by vacuuming the area you want to varnish.
If you are revarnishing, make sure to completely remove the existing varnish (you can use varnish remover).
You can lightly sand the surface to remove any sticky stuff. Cleaning wood surfaces before applying varnish improves the adhesion of the varnish onto the wood.
2. Stir The Varnish Thoroughly
This sounds obvious, right? Many people make the mistake of shaking varnish before applying it.
To create a smooth sheen, stir the varnish, don’t shake. Stirring combines the varnish components without introducing any bubbles as shaking would.
3. Apply Varnish When The Weather Is Fair
For the best results, varnish when the weather is not too humid; otherwise, the varnish will take longer than necessary to dry.
Moreover, high humidity adds moisture to the air, increasing the chances of dampening or dirt settling on your project, which can cause a lot of imperfections.
You also don’t want to apply varnish when the room is too hot, as it might cause messy bubbles to form. As a general rule, varnish indoors when the room temperature is about 20 – 25°C.
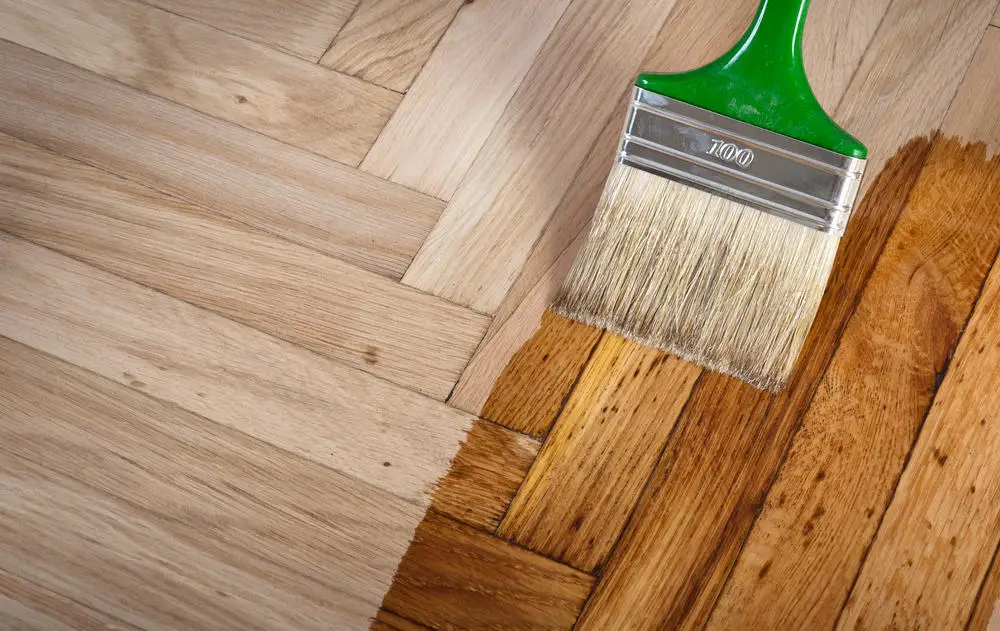
4. Apply Varnish Using A Natural-Bristle Brush
When it comes to varnishing, you can add as many coats as you want, gently sanding in between coats.
Two Problems To Avoid When Varnishing
1. Avoid Inhalation
Ventilation and temperatures are arguably the most critical aspects to monitor when varnishing.
The biggest mistake you can make is varnishing a poorly ventilated room.
Even with a respirator, applying varnish in a poorly ventilated room is asking for headaches, irritation, and other allergies.
For this reason, you want to be very keen to ensure you don’t inhale the fumes when varnishing and during the curing time.
2. Extreme Temperatures
Extreme temperatures as well pose some problems. Too much coldness causes the varnish to thicken, which makes it hard to apply.
If you successfully apply your varnish when the weather is cold, it will take longer to dry, and moisture can possibly get underneath the varnish surface.
On the other hand, if the room is too hot, the varnish will dry quickly, leaving behind gloss that showcases brush strokes, which can be unsightly.
To avoid these problems, varnishing should be done on a dry day with humidity below 80% and temperatures between 65°F and 85°F.
Varnish Best Uses
Varnish has a higher solids ratio, which makes it excellent for most furnishing projects.
The high solid content and water resistance make it appropriate for use on wooden surfaces that are likely to be exposed to water, including kitchen floors and wooden furniture in the basement.
Because of its low toxicity, the varnish is safe and versatile for both outdoor and indoor projects.
Even better, some variants are flexible, which makes varnish useful for softwoods that may flex under extreme conditions.
Notably, although varnish is relatively pricier and requires more coats compared to other options, like polyurethane, it forms a more protective and durable coat.
That’s why it is often used for outdoor projects where susceptibility to UV light and moisture damage are serious concerns.
When applying varnish, it is crucial to use the correct solvents for thinning and allow the individual coats enough time to dry. Before applying each layer, always mix the coating components properly. This will help ensure you get the best results.
Conclusion
Varnish forms a protective and durable layer over wooden surfaces.
Even better, it preserves the natural look of wood by letting the grain appear.
If you are planning to varnish your wooden floor or other wooden elements in your home, hopefully, this post will help you apply varnish indoors safely.
When it comes to indoor varnishing, the most crucial thing is to avoid inhaling the toxic fumes the VOCs emit.
Sources
https://www.bobvila.com/articles/varnish-vs-polyurethane/
https://ecospaints.net/varnish-vs-polyurethane