
When it comes to installing a toilet, it is important to consider its appearance and overall functionality.
Even if you have less concern with aesthetics, functionality is not something you ought to forget.
Otherwise, you will risk having toilet leaks and sewer gas escaping from any gaps around the toilet.
It is, therefore, important to ensure that the toilet flange is attached correctly.
In this regard, Should The Toilet Flange Be Flush With The Tile Floor?
The top of the flange should sit slightly higher than the floor and not flush with the floor. A toilet flange is usually installed on top of the tiles. Ideally, placing the flange flush or below the floor tiles will lead to drainage problems.
Generally, having a leaking toilet can be disgusting.
Imagine having toilet dirt spill all over your bathroom.
See Also: Should The Back Of The Toilet Touch The Wall?
To avoid such and other drainage issues, it is important that you ensure your toilet is set up in the right way.
A flange’s basic function is to hold the toilet bowl firm and underground piping. This post covers more on correct toilet installation and spacing.
Installing A Toilet Flange
When plumbing your new house, a toilet should always be a major consideration because it should be designed in a specific way.
Generally, a toilet flange should be positioned above the tiles to prevent rocking the toilet and leakages.
A toilet flange, also known as a closet flange, is usually placed below the toilet bowl.
There is usually a wax ring at the toilet’s base and the flange. Most toilets have a flange above the floor, about ⅛ or ¼ if an inch above the tiles.
Step By Step Process To Replacing A Toilet Flange
Here are the steps to follow when replacing or repairing a toilet flange on tiles.
1. Empty And Remove The Toilet Tank
Turn off the water supply and flush the toilet until it is entirely empty.
2. Plug Up The Outflow Pipe
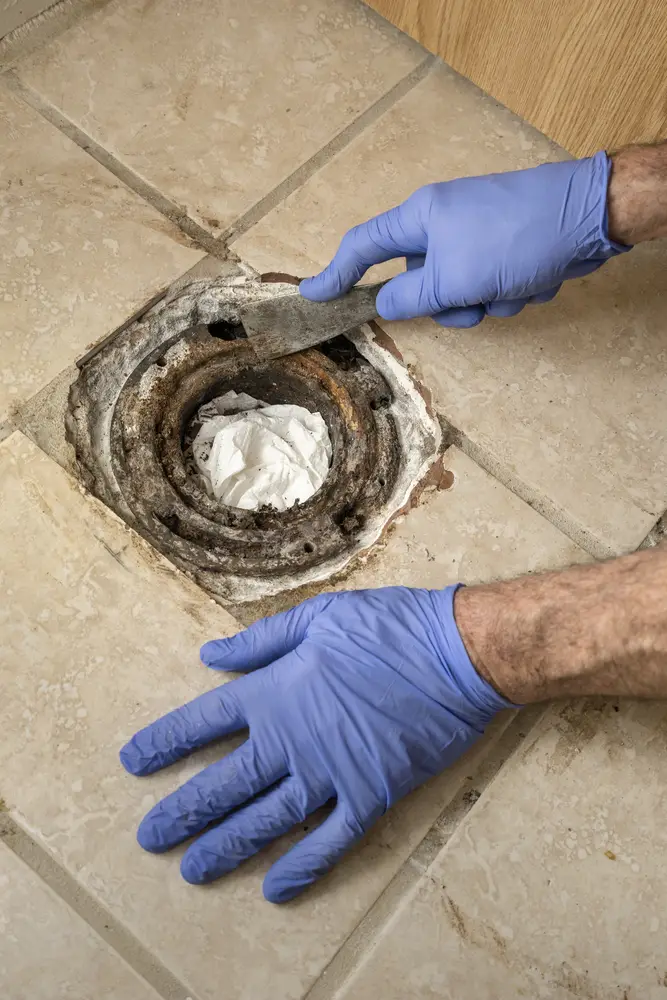
To save yourself from the bad smell and toilet mess, insert a washcloth, a towel, or an old shirt in the outflow pipe.
The clothing is meant to block the smelly glasses from escaping while you are working.
In case of dirt that might thrush backward, it will not hit you as you work.
3. Clean The Old Flange
Using a paint scraper, scrape out the old wax.
A plumber will help you scrape the flange glue downwards if you had earlier used a plastic flange and glued it to a drainage pipe.
4. Pull Out The Old Flange
Ensure you don’t damage the drainage pipes when removing the old flange and wax.
Damaging your toilet’s drainage system can cause a significant plumbing error that will cost you more time and resources to repair.
Carefully pull out the old flange
5. Secure The New Flange In Place
Using a screwdriver and screws, secure the flange on the tile surface.
However, you must ensure that the drilled walls are in the right place before you start screwing.
The best drilling bits are the diamond-tipped drills, which are strong enough to go through tiles.
6. Add A Wax Ring
Carefully add a wax ring that will proportionally fit in the space of the existing flange.
7. Reinstall The Toilet
Place the toilet down and apply pressure on it so that it gets fixed in the right place.
Do not rock the toilet because this can damage the toilet or displace the wax.
The tension caused by the pressure inserted will help secure the seal appropriately, so it does not shake.
Check the bolts to ensure they are well aligned to prevent leakages when using the toilet.
Four Tips For Correctly Installing A Toilet Flange
1. Pay Close Attention To The Flange Height
The appropriate flange height is very key when it comes to matters preventing leakages.
If you put it at the height of the floor or below the floor, leaks will start because the flange will not fit in the horn at the lower part of the toilet.
If you find it hard to install the flange on top of the finished floor, you can use some special spacers to raise the flange on top of an existing one.
You can also find some flangers that allow you to place spacers below them to ensure that the final flange is not flush with the floor.
2. Use Clean Bolt Slots
If you are installing a toilet flange before you do flooring and tile setting, make sure you use painter’s tape to close the open bolt slots, where you will later screw in the bolts.
This is to ensure that there is no dirt, paint, or debris in the holes when installing them.
If you are replacing an old flange, it is important that you clean the slots and remove anything that can hinder the smooth screwing of the bolts and screws.
3. Use Rust-Proof Screws
The rust-proof screws work best over a long time. It is, therefore, imperative that you use them for securing your toilet flange.
Drywall screws will risk and deteriorate within a short time due to continuous exposure to moisture and water in your washroom.
In such a case, the toilet will not be sturdy, the flange will get damaged, and the waste pipes will also have issues.
4. Use The Flange That Has A Knockout Or A Mechanical Test Plug
How you intend to use your plugs is the most significant determinant of whether they will have a knockout or mechanical test plug.
For new applications or remodeling, some flanges have knockout plugs which allow you to test the system without necessarily having to use a test ball or plug.
They also keep sewer gas airlocked and not escaping the environment. A knockout plug easily breaks cleanly, hindering the possible fall of the sewer line after you have tested it.
When remodeling, and you wish to keep the existing flange, a mechanical test plug is the best option to help keep sewer gases away from your working area.
Mechanical test plugs fit well inside a flange and have a gasket usually expanded using a wing nut, thus providing a watertight and airtight seal.
Conclusion
A toilet should be set up in a way that perfectly serves its function.
One way to achieve this is by ensuring the flange is correctly positioned.
Ensure that your toilet flange is at least ¼ inch from the tile floor and not flush with the floor.
This will reduce many drainage issues and prevent sewer water spills all over your bathroom from the toilet.