
Putting new drywall is of the best steps you can take giving your mobile home a new and impressive look.
You want your new mobile home to be a haven and you are going to do all it takes to accomplish that.
Purchase of material is, undoubtedly a top priority.
So, How Much Does It Cost To Drywall A Mobile Home?
The cost of putting up drywall in a mobile home depends largely on the type of material you use to execute the task. The procedure to be used and technical labor are also key indicators of cost.
So, if you are figuring out how to estimate the cost of the drywall on your mobile home, this article is tailored for you.
We have compiled a comprehensive report on different types of material, procedures of installation, and how to get it done.
What Should You Consider When Putting Up Drywalls On Your Mobile Homes?
Like most things in daily investments and upgrades, you must sit down to look into what you are set to do.
1. The Cost Of The Project
You need to have a blueprint on the cost of the project before you embark on its implementation.
The cost of the materials themselves has a primary impact on the overall budget of the project.
On average, drywalls go for about $1.5 per square meter. You should, therefore, be financially well prepared to avail all the necessary drywall materials.
The market is laden with drywalls of various grades and qualities.
The entire project is expected to cost you about $45 to $60.
Not that it can vary depending on the contractor you have tasked with the work.
The location of your mobile home is also a determining factor when it comes to budgeting and installation.
2. Whether You Require Sheetrock Or Not
You need to be decided on whether you will install sheetrock to the ceiling’s height.
Sheetrock goes hand in with drywalls. They ensure that drywall sheets are well fitted in place.
Well, that is the best way to avoid any inconsistencies that could potentially ruin the impression of your drywalls.
Large sheets may require wall studs. They are used to fix the drywalls precisely in place.
Installation of drywall is one of those projects that can be effected entirely by one slight mess. So, you don’t want to allow any room for error.
3. The Load To Be Supported By The Drywall
You are going to hang plenty of stuff on your walls. Can your drywalls support them? Drywalls should be fitted to support both heavy and lightweight items.
4. The Average Remodeling Costs
Aside from analyzing the cost of the material, it is also important to look into the labor requirements and their cost.
It is going to be a long procedure that requires special inspection and a lot of effort.
You are aiming at installing the best drywall and you are not going to take anything for granted.
Your new home must look neat, organized, and impressive.
5. The Quantity Of Material Required
You should first get the dimensions of your rooms.
This will help to ascertain the size of drywall you should buy.
If your mobile home has more room, you should brace to buy more drywalls to suffice the demand. Designers build mobile homes to be light.
However, wooden studs are often fitted to give them more strength. This is an additional requirement that must be reflected in your budget as well.
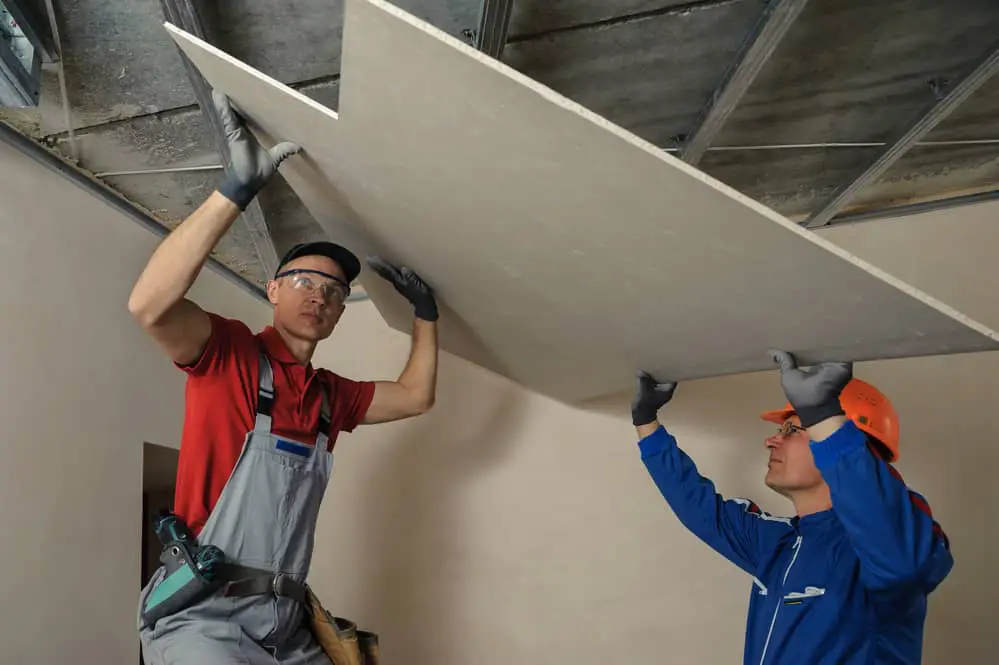
A Step by Step Guide To Drywall a Mobile Home
1. Detach all Electric Outlets
Baseboards, strips, and moldings must be removed before anything can be done. The ceiling strips should be removed as well.
2. Disconnect The Electricity In The Room
Electricity can be very dangerous. Naked wires and open sockets potentially jeopardize the lives of people in the room.
You need to switch off the power supply to the room under construction.
The best you can do is to turn off electric breakers.
It saves you the energy of having to remove all panels on the wall. You are trying to be less invasive so you should not expose any wires.
It is very boring to remove all wires as that will require you to reorganize and reposition them when you are done with fixing the drywall.
Consequently, you will require additional fixation costs.
It is a good idea to cut off the power supply to a room if you are going to drywall the entire room.
3. Pry Old Panels
Using loose seams, pray all the old panels starting from the corners.
Aim at maintaining a firm placement. This might take time but it is important to complete the job with credible and satisfying results.
Should you bump on any problem with your electric boxes, it is a nice idea to reposition them.
Later, when you are done with drywall, you can come back and coat them with new surfaces. Or rather you can flush them with customizable extender boxes.
4. Screw The Drywalls Onto The Walls
Use a 1 or ¼ inch screw to fix the drywalls onto the studs.
To avoid possible damage on the papers, use a simpler to carefully drive screws through the drywall.
Technical areas such as doors and windows should be protected with full sheets.
The joints must be kept very firm. Remember to measure the spots where you will later fix electrical openings.
Adhesives can be used to further fix the drywalls onto the studs.
5. Conceal Drywall Fasteners
To keep the drywall surface even and smooth, you should hide all the fasteners.
It makes painting easy.
There are special adhesive fibers that can be used to conceal these marks.
Jointing adhesives can also be used to cover the fasteners.
Apply some pressure on the edge of the drywall to make them dry fast.
The joints should be maintained smooth and flat. Allow no sign of irregularity on these parts.
Bulging ends make the room look weird. That is the least you would expect after investing all your money in such a delicate project.
6. Cover The Screw Heads
To fill depressions on the surface of the drywall, you must cover the screw heads.
Drywall adhesives are used to accomplish this. Such adhesives can be applied once the edges have fully dried.
Any cut marks can be smoothed out using a sponge by wiping it over the mark.
7. Reinstalling All The Interrupted Outlets
Your walls are not complete until you have reinstalled all the disrupted outlets.
Fix back the electric outlets. You can then place back all switch covers.
If you had decided to alter their placement points, you have to fit them in the proper order as before.
After installations, such outlets should be checked to ensure that any irregularity is corrected.
You may want to paint some parts of the wall later on. That to add to the quality of work you do.
Final Words
Installing drywall is one of the best renovations you can make in your mobile home.
The cost of doing it entirely depends on the size of the rooms to be covered and the type of material you use.
Follow this guide when installing drywalls for your mobile home.
Even if you will employ some labor to do it for you, it will help you to estimate how much you can spend on the entire project.
Related
References
https://homesteady.com/12279699/how-to-drywall-a-mobile-home
https://homeguides.sfgate.com/replace-singlewides-walls-drywall-103022.html